Beneath the Dragon-Queller |
|
|---|---|
 |
|
| Location | Nantianmen, Minlin, Liyue |
| Type | Trounce Domain |
| Unique Rewards | |
| Boss | Azhdaha, Sealed Lord of Vishaps |
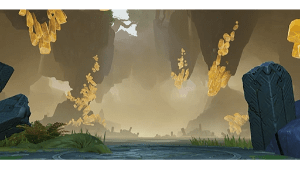
Beneath the Dragon-Queller is a Trounce Domain in Genshin Impact. Domains are dungeons in Genshin Impact which challenge the player to fight enemies for rewards such as Artifacts, Weapon Ascension Materials, Weapon Enhancement Materials, Talent Level-Up Materials, Mora, and more. There are 6 different types of Domains in the game: Domains of Blessing, Domains of Forgery, Domains of Mastery, Trounce Domains, One-Time Domains and the Spiral Abyss.
Across the long years, this bed of rock, carved into the very heart of the world, has imprisoned Azhdaha like a coffin.
Beneath the Dragon-Queller Information Genshin Impact
- Required Adventurer Rank: 35/40/45/50
- Recommended Party Level: 60/70/80/90
- Resin Cost: 60 (30 for the first 3 Trounce Domain rewards claimed)
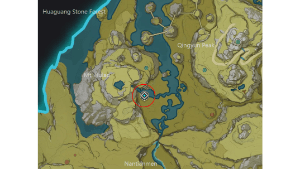
Where to Find Beneath the Dragon-Queller in Genshin Impact
Nantianmen, Minlin, Liyue (Click to enlarge)
Beneath the Dragon-Queller Rewards in Genshin Impact
Beneath the Dragon-Queller rewards players with the following unique Talent Materials:
 Dragon Lord's Crown
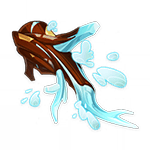 Bloodjade Branch
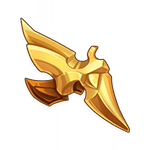 Gilded Scale
Beneath the Dragon-Queller also rewards players with the following:
 Berserker
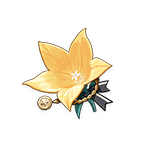 Instructor
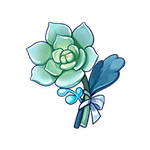 The Exile
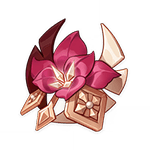 Gladiator's Finale
 Wanderer's Troupe
- Ascension Gems
Beneath the Dragon-Queller has a small chance to reward players with other items:
- Dream Solvent
- Northlander Bow Billet
- Northlander Catalyst Billet
- Northlander Claymore Billet
- Northlander Polearm Billet
Beneath the Dragon-Queller Ley Line Disorder Genshin Impact
| Level | Ley Line Disorder |
| I-IV |
|
Beneath the Dragon-Queller Boss Guide in Genshin Impact
Attacks & Counters
| Attack | Counter |
| Phase 1 | |
| Basic Tail Smash | When trying to get a few hits behind the boss, keep an eye on its tail that will smash down every once in a while. |
| Basic Stomp | Another basic melee movement that begins as he lifts his foot much like its tail. This one causes a slight ripple of AoE damage. This will pulse three times and can be done on any of the boss's feet. Do not try to use your shield against this attack because you will still take some damage. |
| Basic Side Step | The boss has another action where he steps to the side. You can anticipate this happening as he lifts both legs on to one side. He follows through and rocks to the side. As you see this happen, be prepared to step back or circle to the other side. |
| Jump | This one is probably the largest AoE of the boss's basic attacks. You will see him leap directly upwards. His landing will cause a double pulse AoE. This affects a large range. Try your best to put as much distance between you and this boss, or you can attempt to iframe during the damaging pulses, though you will |
| Burrow | The boss dives into the ground and makes his way around the arena. You can still keep an eye on him by watching his back spikes, which will peek out at times. After a few turns, the boss will emerge again somewhere near the player. During this action, be wary of the falling boulders. AoE damage indicators for these will also be shown on the ground so that players can prepare to avoid damage. |
| Phase 2 | |
| Hyrdo Orbs | Water orbs will enter the arena. This will cause damage over time if you touch it. They tend to circle around the arena and float through. These move slowly so just be aware of your surroundings at all times. |
| Hyrdo attacks | All attacks from phase one will be carried over to phase 2 but they will be enhanced with the Hydro element. This makes the attack slightly stronger and some attacks will add an extra wave of water that ripples out during these attacks. Jump attack now also adds a splash to its radius and some extra water torpedoes. You can expect extra features like that throughout his melee attacks. Bigger effects of the element may be encountered later in combat closer to phase 3. |
| Phase 3 | |
| Submerge | This moves invlovles the boss submerging itself into the ground with nothing else exposed but its tail. This is actually an opportunity to deal some damage. Go ahead and attack the exposed tail, but notice the markings on the ground. Stay clear of electro colored flooring and try to find a safe empty unmarked plot. The indicators will fan out from a center platform. This can sometimes be off center from the tail and will force you to back off a lit. Back away if necessary and use ranged attacks instead. |
| Electro Attacks | Some of his regular attacked are now enhanced with the Electro Elemnet. His tail sweep will let out electro orbs. These move slowly. Just avoid them. His Slam movements will also now have a large range or AoE. Be prepared to back away further than the previous phases. |
| Phase 4 | |
| Elemental Combo | This phase combines the elements used in previous phases. You will be forced to find a balance of the distance you want to keep with the boss. At this point the Boss's hp should be dwindling and you will just need to finish him off using the same avoiding tactics from his AoE attacks. |
Strategy Writeup
If choosing to face this enemy upclose with melee attacks, make sure to keep in mind his many AoE attacks, and to generally stay away from his head area, as that is where most of his damaging attacks will stem from. You generally want to get behind him to receive the least damage. Just keep an eye for when his tail will slam down on the ground.
Also be wary of the extra elements that may fall or roam throughout the arena in the different phases. For example Phase one will have falling rocks accompanied by some attacks and phase 2 will add an additional feature of hyrdo orbs floating around the arena as well.
This boss takes advantage of the elements, be prepared with a build to combat each of them. Each phase will enhance a boss attack with a new element. In Phase 2 you can expect all the same abilities featured in phase one but now enhanced by the hydro element. This can also expand the range and add extra lengths and patterns to some attacks.
The boss actually alerts players as it transitions from phase to phase. You will notice it when he performs 6 stomps back to back, followed by a quick animation.
- Phase 2 occurs at around the 60% HP point (Hydro)
- Phase 3 occurs at a little less than 50 % HP (Electro)
Beneath the Dragon-Queller Notes & Trivia
- ??
- Beneath the Dragon-Queller other notes, tips, and trivia go here.
- Most Domains allow Travelers to choose a difficulty from I-VI or I-IV, with each subsequent difficulty giving more bountiful rewards, but also making the Domain more challenging. Each difficulty has an Adventurer Rank requirement that restricts Travelers from entering Domains too difficult for their current level.

