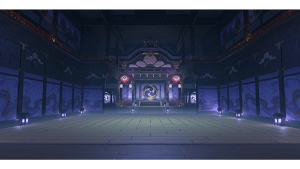
Narukami Island: Tenshukaku |
|
|---|---|
 |
|
| Location | Inazuma City, Narukami Island, Inazuma |
| Type | Trounce Domain |
| Unique Rewards | |
| Boss | La Signora, Eighth of the Fatui Harbingers |
Narukami Island: Tenshukaku is a Trounce Domain in Genshin Impact. Domains are dungeons in Genshin Impact which challenge the player to fight enemies for rewards such as Artifacts, Weapon Ascension Materials, Weapon Enhancement Materials, Talent Level-Up Materials, Mora, and more. There are 6 different types of Domains in the game: Domains of Blessing, Domains of Forgery, Domains of Mastery, Trounce Domains, One-Time Domains and the Spiral Abyss.
This is the dwelling of the Raiden Shogun, who rules over Inazuma. It is also the perfect place for a "duel before the throne."
Narukami Island: Tenshukaku Information Genshin Impact
- Required Adventurer Rank: 35/40/45/50
- Recommended Party Level: 60/70/80/90
- Resin Cost: 60 (30 for the first 3 Trounce Domain rewards claimed)
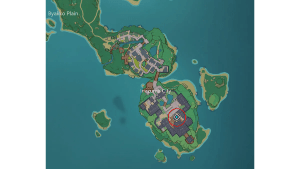
Where to Find Narukami Island: Tenshukaku in Genshin Impact
Inazuma City, Narukami Island, Inazuma (Click to enlarge)
Narukami Island: Tenshukaku Rewards in Genshin Impact
Narukami Island: Tenshukaku rewards players with the following unique Talent Materials:
Narukami Island: Tenshukaku also rewards players with the following:
 Berserker
 Instructor
 The Exile
 Gladiator's Finale
 Wanderer's Troupe
- Ascension Gems
Narukami Island: Tenshukaku has a small chance to reward players with other items:
- Dream Solvent
- Northlander Bow Billet
- Northlander Catalyst Billet
- Northlander Claymore Billet
- Northlander Polearm Billet
Narukami Island: Tenshukaku Ley Line Disorder Genshin Impact
| Level | Ley Line Disorder |
| I-IV |
|
Narukami Island: Tenshukaku Boss Guide in Genshin Impact
Attacks & Counters
| Attack | Counter |
| Phase 1 | |
| Ice Shard / Razer | This is a two part combo attack. She shoots shards of projectile ice in your direction and immediately follows up with an ice wheel. This wheel has a slight homing feature. |
| Icy Floors | Avoid these frosty floors to keep your gauge low. You have to cleanse these with a vial. |
| Blizzard | Snowflake markers will begin to appear on the ground. Avoid this area because they will soon be hit by a stream of ice blizzards. You will have a second before it begins. |
| Ice crystals | She throws ice crystals on the floor that act as mines. Steer clear of these crystals to avoid damage. |
| Spear | You will notice ice above you start to form and a spear will appear. You will a second to get out of the way before it spirals down. Once landed, continue to stay out of range because it will also have a secondary explosive effect |
| Homing Spear | These spears are summoned consecutively and have a homing feature that tracks you. These spears are fast moving and have fairly accurate tracking. Try to dodge them when they are closer to you to have give these spears less of a chance to change directions. |
| Teleport | This boss tends to teleport directly to you, combined with an attack. Keep an eye on her and as she disappears, be prepared dodge away |
| Ice Barrier | This transition appears when the boss gets down to 20%. You need to break this barrier to progress to the next phase. This barrier is immune to cryo hydro and physical damage, with the exception of claymore physical damage. At this point you may also find some flaming moths roaming the arena. Grab them when you see them to make the next attack you deal stronger and speed up the process into the next Phase. |
| Phase 2 | |
| Pryo Elemental | In Phase 2, they switch to the boss's pyro abilities and she gains 70% pyro resistance, and you will have a new blazing heat gauge to keep track of instead. |
| Bird Summon | She summons a small bird in your direction. This bird has tracking abilities, but is slow enough to avoid. Run around the arena to shake it off without turning back into it. It should always keep a distance behind you. You can also attempt to dash through this bird. |
| Fire Whip | Watch the boss and prepare for her attack when she pulls back a fiery whip. She uses more than one pattern with this attack. She can begin with a regular whip crack. This whips forward and damage extends fanning outwards. This could be followed by a double swing. This swings left and right, with the second crack extending further than the first. The other two are variations of this where her whip crack can deal a wider range of damage and she could also perform a basic single swing. Try to get into a position behind her once you see her pull back this whip. |
| Moth Projectiles | She summons a rain of projectile fiery moths. This usually follows a quick charging animation. This only affects the area within a small range directly in front of her so be ready to dodge backwards. |
| Meteor Shower | This one is anticipated once you notice a longer charging animation. She will then hold her arms up summoning a rain of Meteors. These tend to stay towards the center of the arena so find your way to the edge until the shower is finished. |
| Tornado | She turns herself into a tornado and can spawn smaller tornados. They will usually spread in a box pattern. Keep a distance so you can dodge away from the mini tornado spawns. Do not attempt to hit her at this point. She will not take damage. |
Strategy Writeup
A unique feature about this encounter is the use of a new gauge. You can find your gauge above your HP Bar. These bars fill up the longer you come into contact with the corresponding element. For example Stepping on ice flooring will increase your 'Sheer Cold' bar. There are ways to decrease the gauge. Stand near the lanterns 'hearts of flame' in the arena to slowly decrease the meter. Destroying the lantern will completely clear your gauge and bring it back to 0. 2 of these lanterns will continue to respawn throughout the match. If a player's gauge reaches 100%, the player will begin to lose 1 HP Per second. A shield will not prevent damage. The Blazing Heat gauge also has the same mechanic, except with pyro damage instead. The Gauge rate of increase will also increase and accelerate halfway through the battle.
The best time to attadk would be in between her attacks. Watch out for openings and cooldown periods in between attacks and be prepared to run in and deal some damage while there is an opening.
Also take note of the stat changes between each Phase. Use the appropriate elements against cryo and pyro attacks in their respective phases.
Phase 1
- Physical - 10%
- Pyro - 10%
- Cryo - 50%
- Electro -10%
- Anemo -10%
- Geo - 10%
- Hydro - 10%
Phase 2
- Physical - 10%
- Pyro - 70%
- Cryo - 10%
- Electro -10%
- Anemo -10%
- Geo - 10%
- Hydro - 10%
Narukami Island: Tenshukaku Notes & Trivia
- ??
- Narukami Island: Tenshukaku other notes, tips, and trivia go here.
- Most Domains allow Travelers to choose a difficulty from I-VI or I-IV, with each subsequent difficulty giving more bountiful rewards, but also making the Domain more challenging. Each difficulty has an Adventurer Rank requirement that restricts Travelers from entering Domains too difficult for their current level.

